


How to Use Runway Act One: Step by Step Guide
Producing animated characters used to be a process that required a lot of technical expertise, time, and effort to accomplish.
However, Runway has developed a tool called Act One to help streamline the process.With this feature, you can transform any real-life footage into an animated version that looks, acts, and moves in a realistic and believable manner.
But if you're new to Act One, it may be daunting to get started with this tool. In this comprehensive guide, we will explore everything about Act One and how you can use it. Read on for all the details!
What Is Runway Act One?
Runway Act One is an advanced AI tool that allows users to use existing videos and still character reference images to produce stunning animations in just a few clicks. You can choose to record a live-action video of yourself or even use cinematic videos of other real people and create a cartoon-like version that speaks, looks, and acts in a similar way.
This animator tool is available on Runway’s Gen-3 Alpha and Gen-3 Alpha Turbo models at a cost of 10 credits per second and 5 credits per second, respectively. Keep in mind that partial seconds will typically be rounded up to the nearest decimal. For instance, a 4.6s video will be charged around 46 credits on the Turbo model.
In terms of video length, you can use act Act One to produce videos with a maximum output duration of about 30 seconds. You also have the option of choosing between different aspect ratios: 1280x768 (landscape) or 768x1280 (portrait).
What Are Runway Act One’s Features?
Runway Act One comes with a wide range of powerful video production features that make it possible to produce expressive character videos using simple image/video references. Some of these key aspects include:
Advanced 3D Modeling
Using cutting-edge 3D modeling technology, Act One can transpose a real subject’s camera performance into a 3D version that accurately preserves the same nuances. This includes micro-expressions, delivery, etc. As a result, you won’t need any extra equipment to capture the essence of what makes the live-action character video so special.
Animation Mocap
Act One is an incredibly versatile tool that can be used with an extensive range of reference images. Some of these include; pixar-style animations, claymations, 3D animations, and so much more. For this reason, you can use this tool to experiment with numerous types of character designs to produce unique and inventive videos.
Live Action
Besides creating new animations, Act One can also help you produce cinematic videos with realistic and believable characters that present authentic emotions and expressions. This opens up new possibilities for video creation, as you won’t have to spend so much time, money, and effort shooting live videos.
How To Use Runway Act One?
Now that we’ve established what Runway Act One can do, let’s get into the step-by-step tutorial on how to use it. Before you can get started, you will need to create a Runway account. The platform has a free tier plan that offers 125 credits but keep in mind that Act One is not included, which means you will need to subscribe to a premium plan.
First, head over to the Runway website and register/log in to your account. From there, you can subscribe to one of their paid plans. Just keep in mind that even with a paid plan, there are limits to the number of videos you can generate. As such, you should subscribe to a plan that best fits your video creation needs and budget.
Step 1: Upload Existing Video
Once you open the user dashboard, head over to the ‘Generative Session’ section. From there, scroll down to the bottom of the page and select the Gen-3 Alpha or Turbo model. You should then see and click the Act One icon showing up in the left-hand user toolbar.
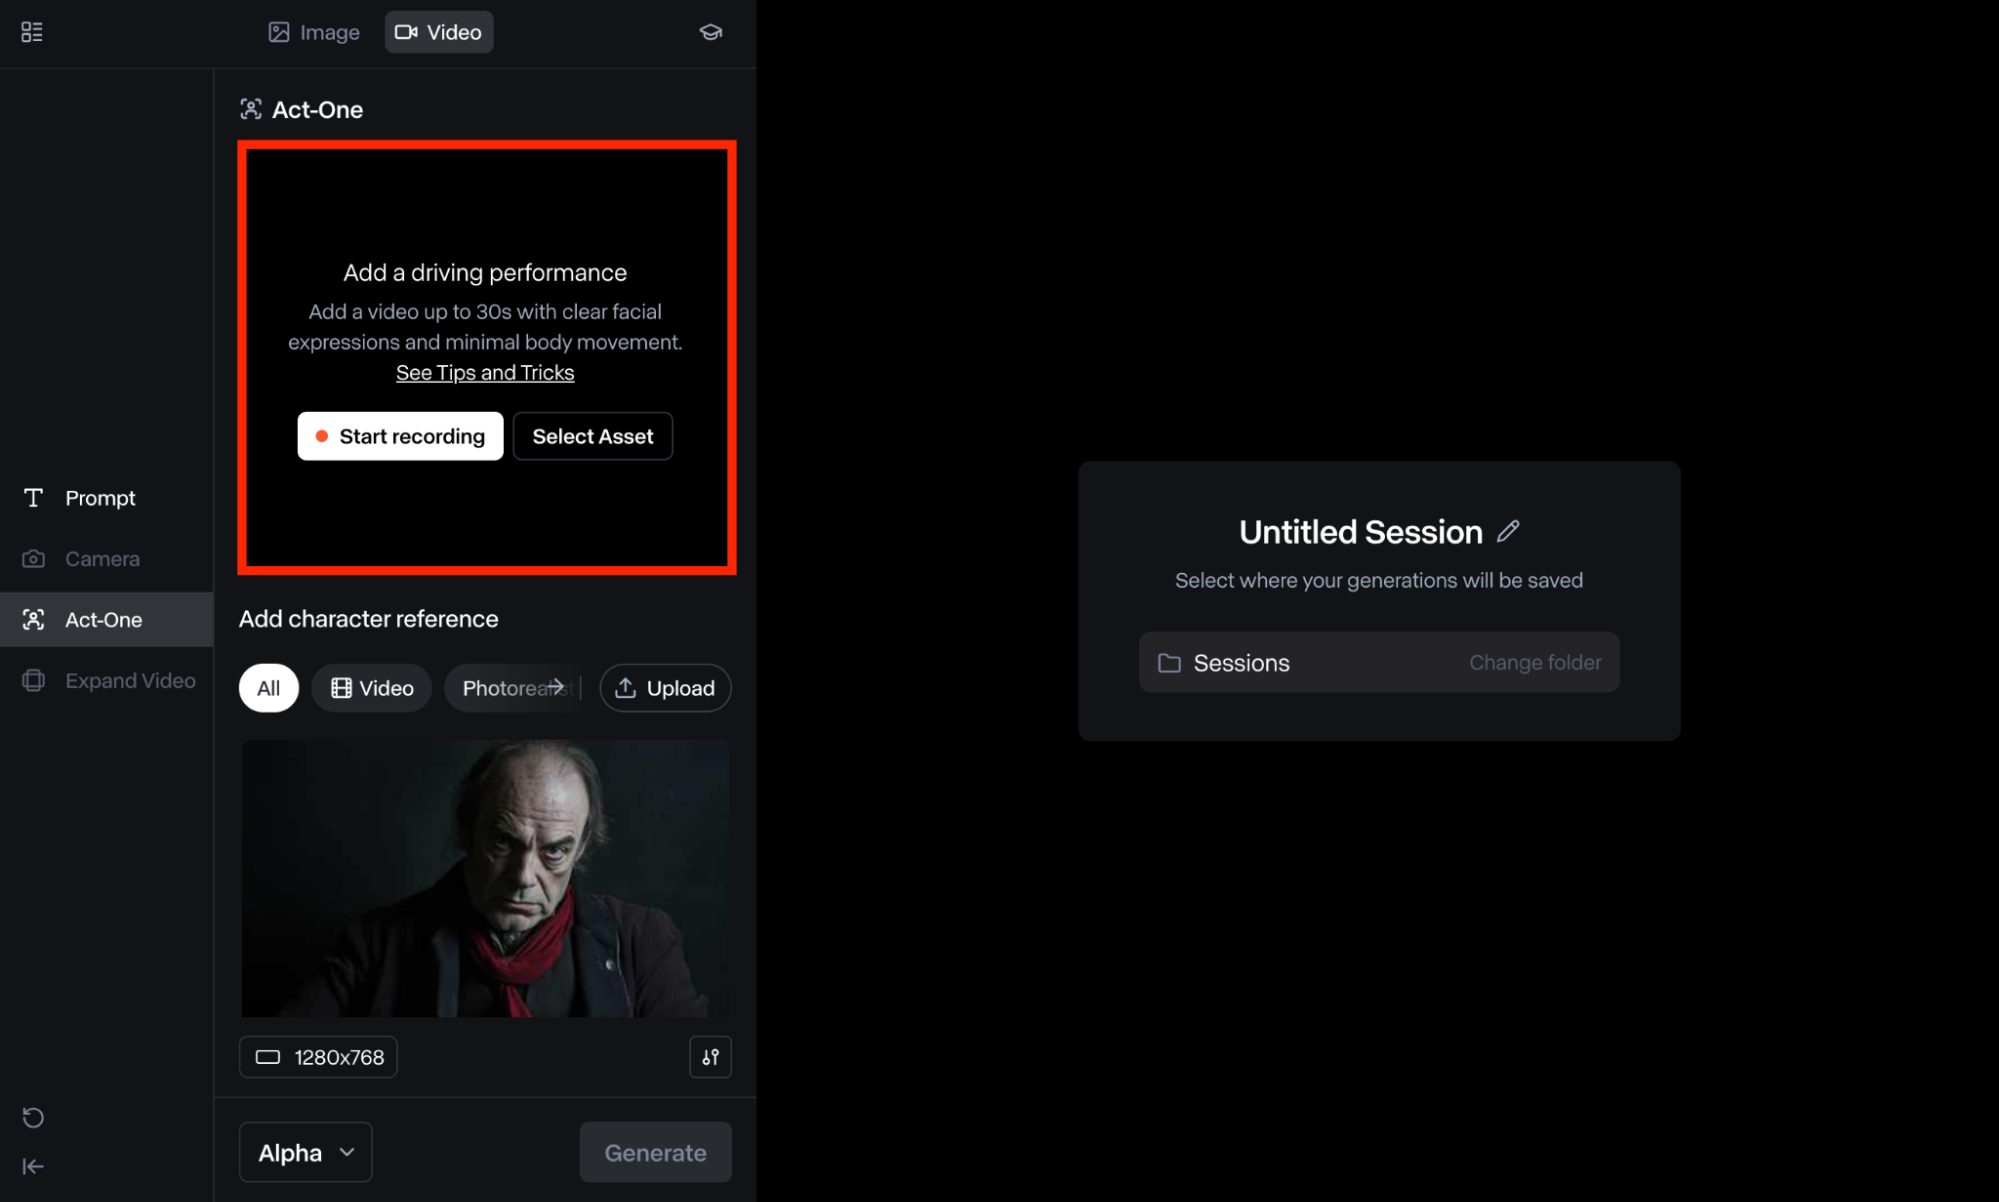
At this point, you can start by uploading an existing live-action video of yourself/subject or choose one from your Assets (if you have used Runway to generate videos before). You also have the option to record the video directly from the app.
To record a video, click the ‘Start Recording’ button. Depending on your browser, you may need to grant permission for the Runway app to access your camera and microphone. Click the ‘Stop’ button to end the recording or feel free to start over again.
Step 2: Input Character Reference Image
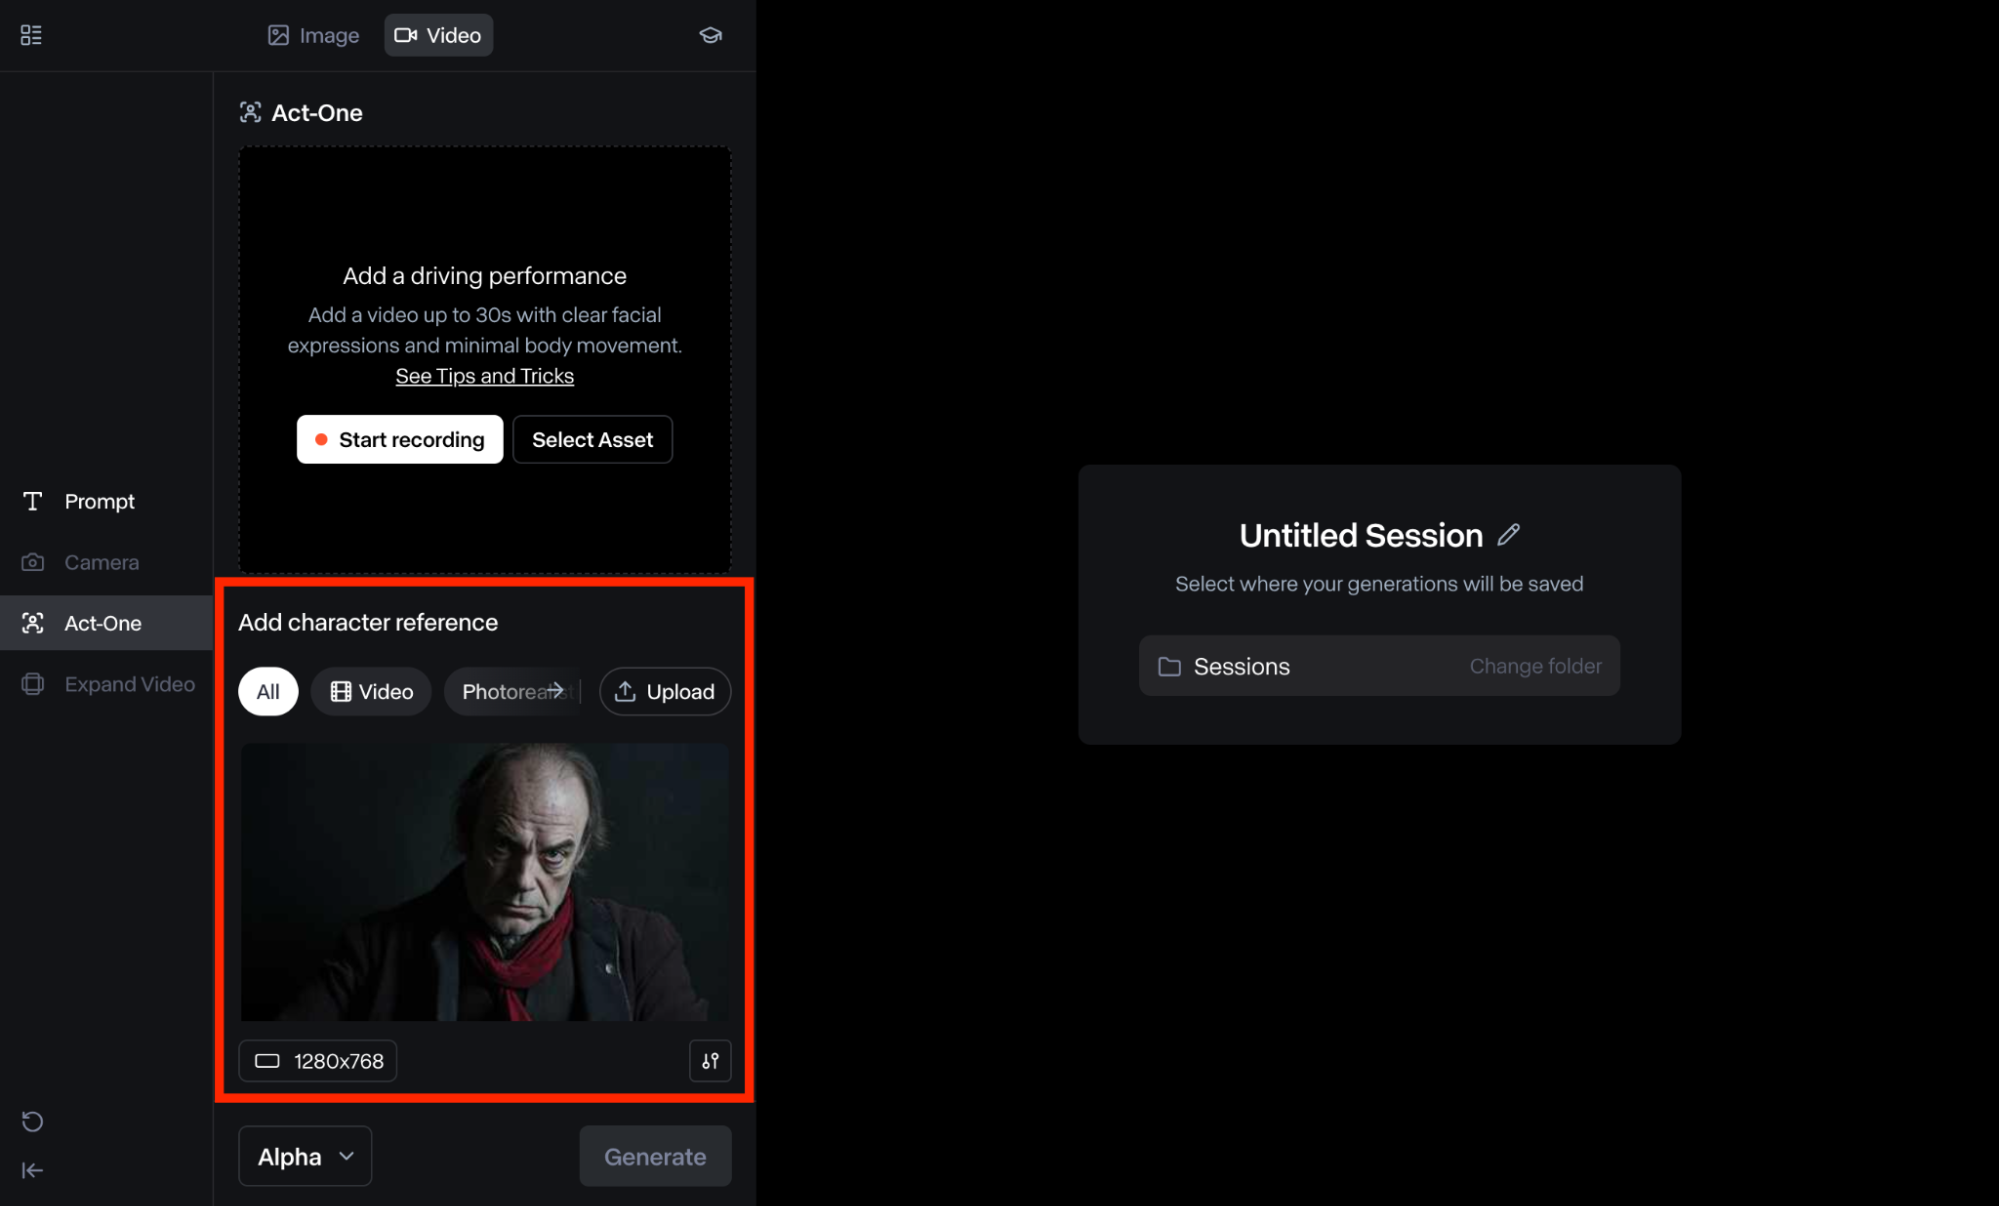
As mentioned before, Act One enables you to upload both videos and character reference images. Once you’ve uploaded the existing video, you can scroll down to the character reference input section at the bottom.
The tool lets you choose from an existing preset or you can opt to upload your own reference image. You also have the option to choose a reference video, which is ideal because it tends to offer more motion and flexibility for the AI model to work with.
Step 3: Adjust Motion Intensity
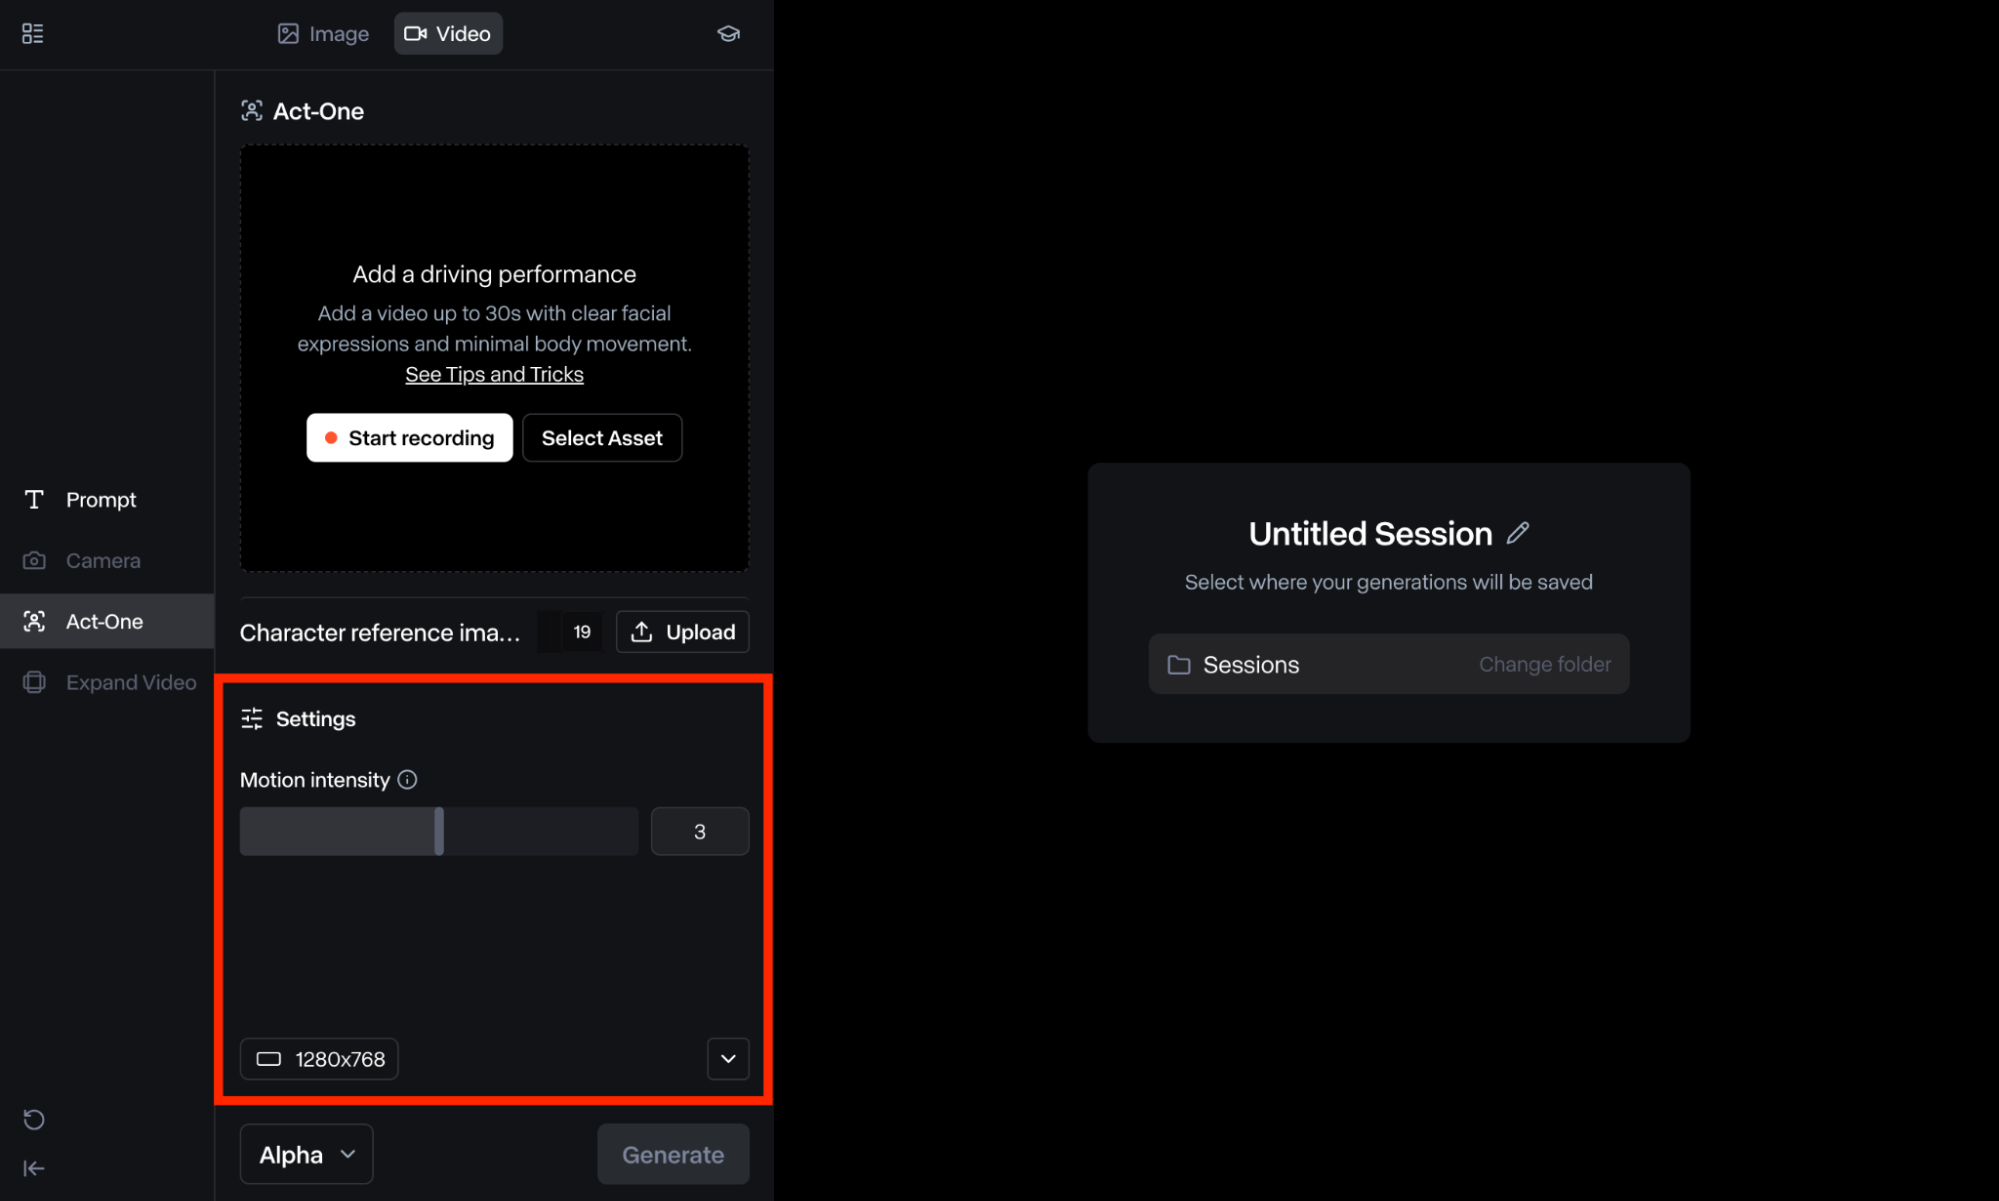
Act One also enables you to configure the video output’s ‘Motion Intensity’ value, which you can access by clicking on the Settings icon, just below the character reference section. Keep in mind the value can be configured between 1 to 5.
The tool will typically default to 3. However, you can freely adjust this to cater to your precise needs. The lower the value is, the more stable the output will be. Whilst, the higher the value, the more expressive the final character motions will be.
Step 4: Generate Your Video
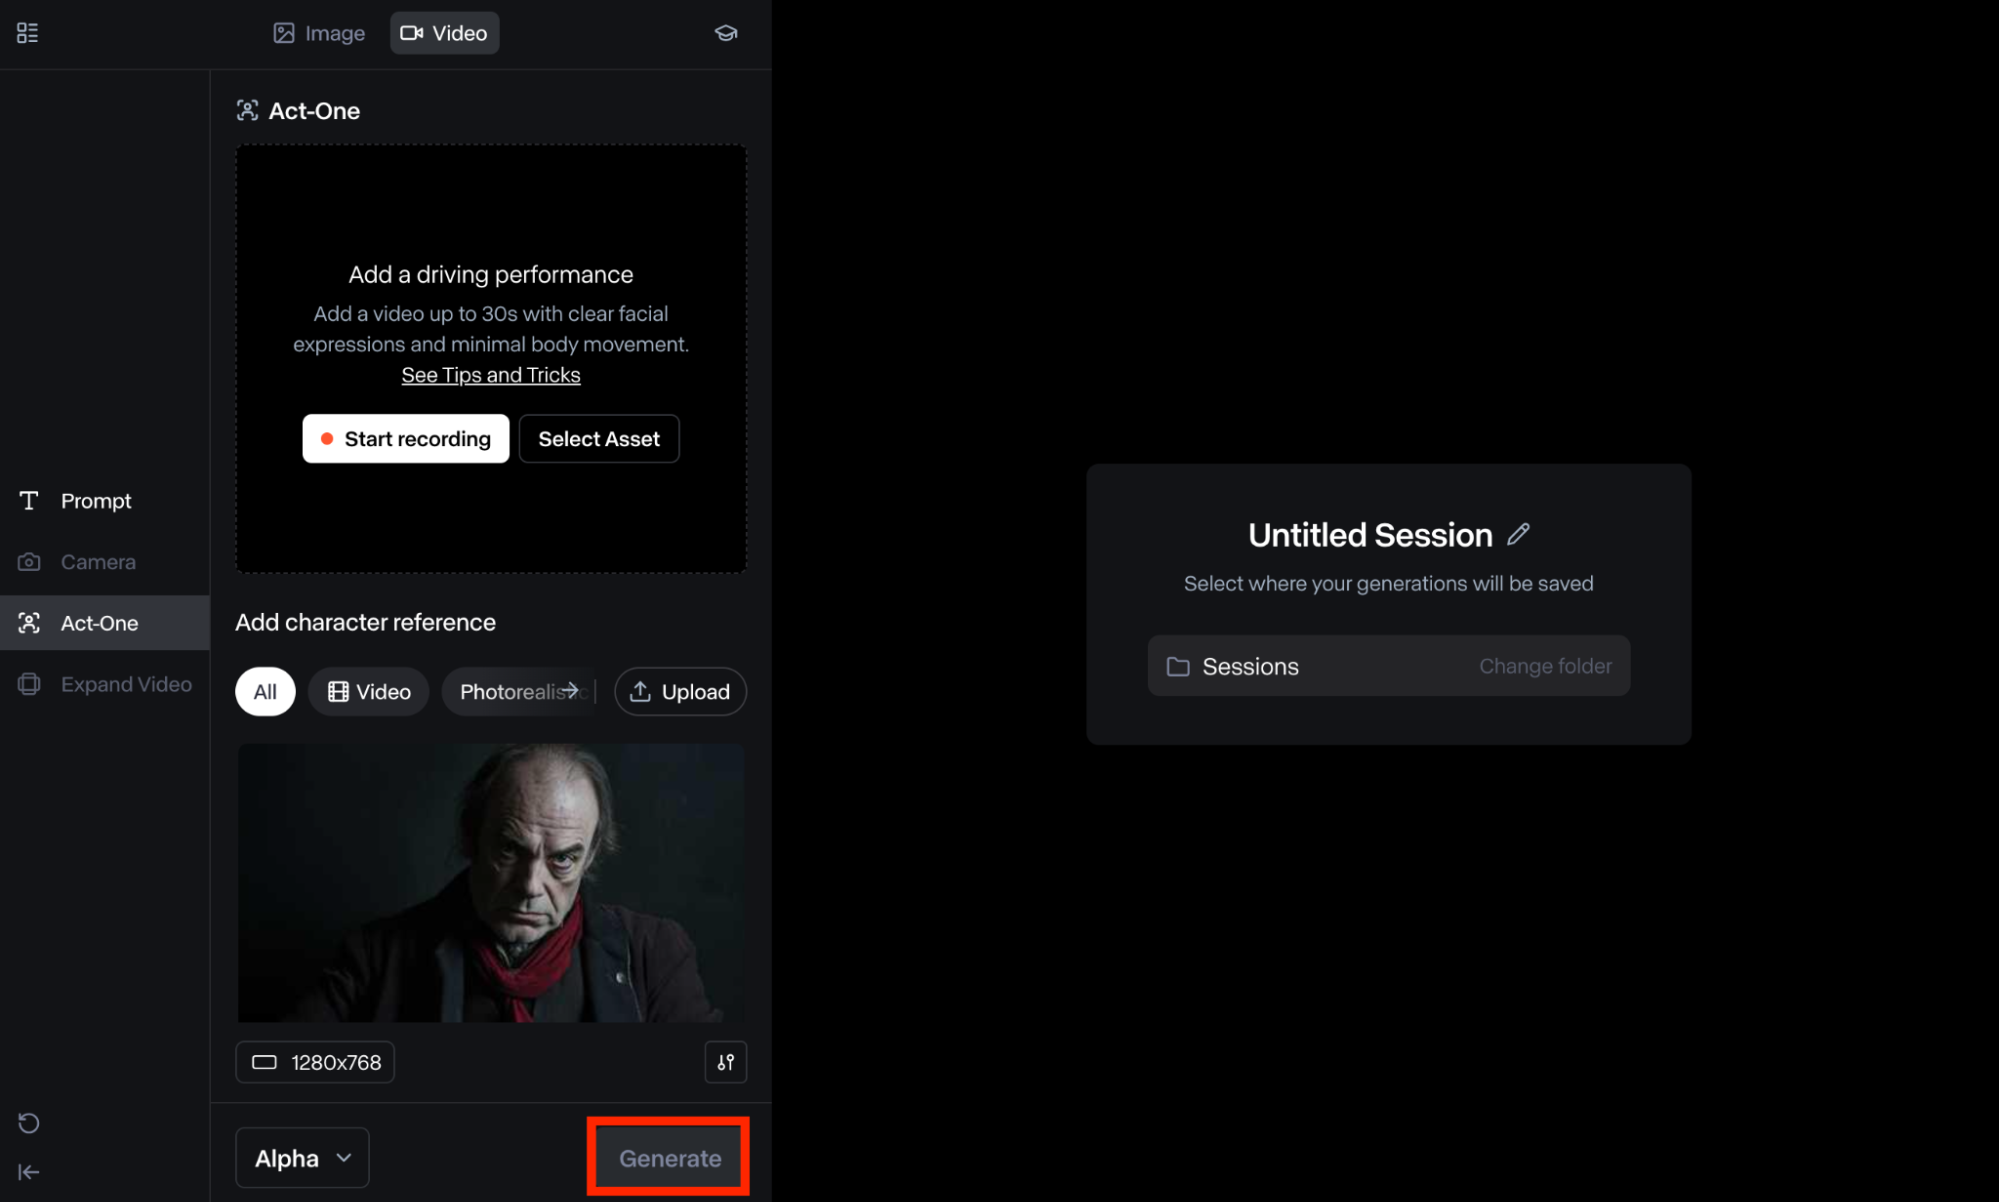
If you feel content with your selected inputs, then you can proceed to click the ‘Generate’ video. Remember, you will be able to see the estimated credit costs before initiating the generation by hovering over the duration model.
Runway will typically take a few minutes to generate your video, which you can then review and download as an MP4 or GIF. Alternatively, you can also feel free to customize the final output further if necessary.
Top Tips When Using Runway Act One?
There are a few best practices that you can follow when using Runway Act One to ensure the video output it produces meets your quality standards. For starters, when uploading the initial/existing video, the character/subject must always be forward-facing/front-view. Moreover, it should always be shoulder and up or torso and up rather than full body view.
You should also try to minimize body and head movement. This is important because the tool focuses on facial close-ups, which means it will conduct a preliminary face-detection scan. If you want to avoid getting ‘Unable to detect a human face’ or ‘We detected too much movement’ errors, you must always keep this in mind.
Additionally, there may be times when you don’t get any errors before generation but you may end up with an issue in the output. For instance, it is not uncommon to sometimes get intermittent artifacts in your output. In such cases, you can always try to re-run the generation, which should help to resolve the issue.
Conclusion
Runway Act One is an advanced video creation tool that can simplify character animation in just a few clicks. As we’ve explored in this guide, it can create all kinds of animated characters and present the same realistic movements, expressions, and actions as the real person. And hopefully with our guide above, you've already known how to use this Act One.