


How to Use AI Virtual Try-On in Kling AI
Have you ever wished you could try on clothes without stepping into a store? If yes, then Kling AI's AI Virtual Try-On is for you. With this cutting-edge tool, you can see exactly how an outfit or accessory will look on you—right from your phone or computer.
Curious to know more? This step-by-step guide will show you how to use AI Virtual Try-On in Kling AI. And we’ve also included images with each step! Check it out!
How to Experience Virtual Try-On in Kling AI
Kling AI’s Virtual Try-On is simple to use. You will only have to follow these steps, which we will discuss below:
Step 1: Access and Prepare Your Files
First, head over to Kling AI official website. And then directly click on the Image button on your left side.
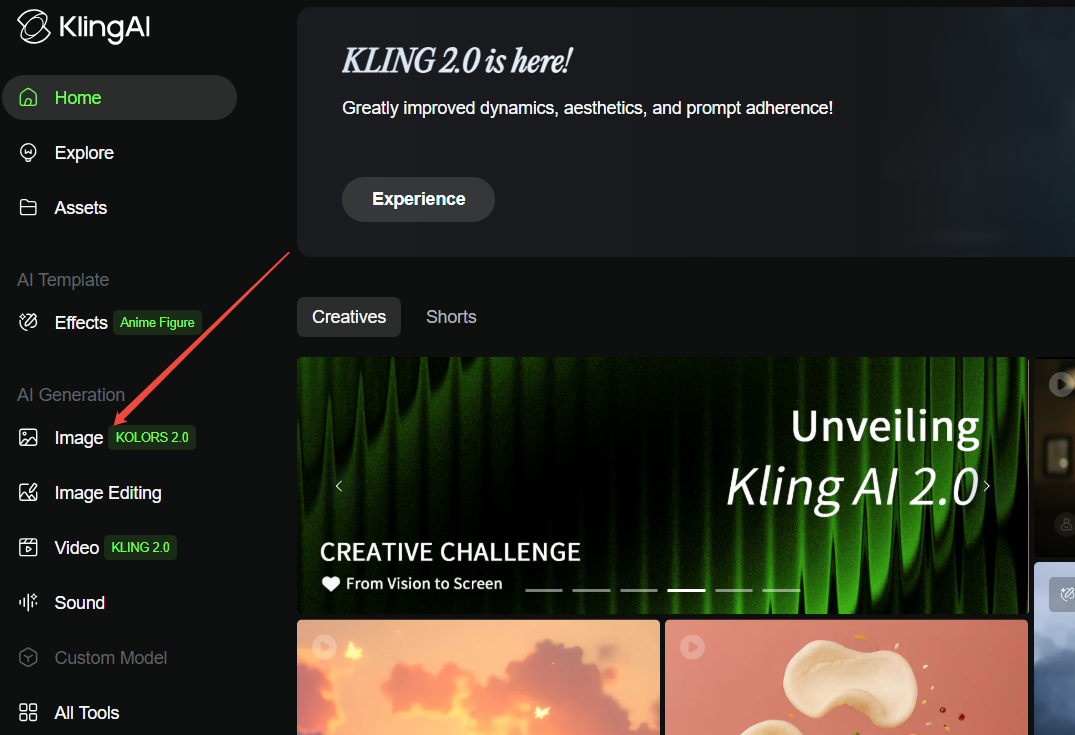
Choose AI Virtual Try-On on your left to continue.
Before uploading anything, click the Guideline button to see the file requirements.
Here’s what your images need to follow:
- Picture Size: Must be less than 50 MB.
- Image Dimensions: Between 512px and 4,096px.
- File Formats: Kling AI supports images in JPG or PNG.
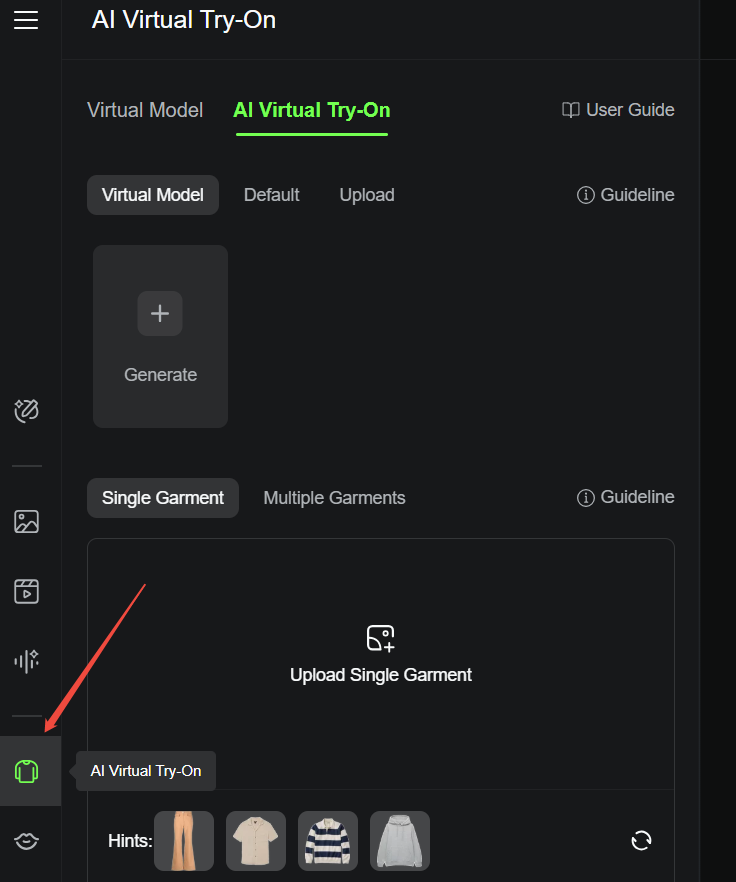
Step 2: Configure Your Model and Garments
In this step, you need to select a model to display the garments. There are three choices available:
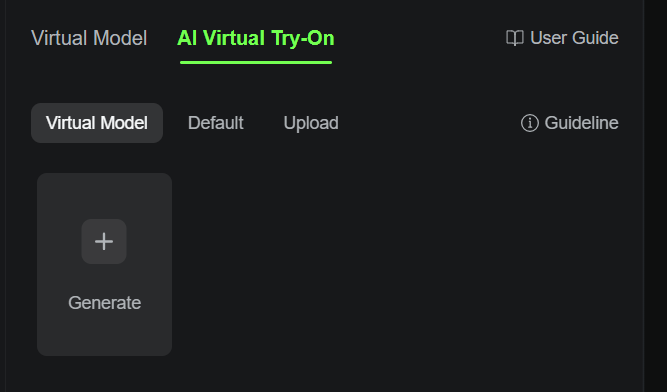
- The first option is the Virtual Model. You can generate a virtual model by entering a text prompt and choosing settings, like skin tone, gender, age, etc.
- The second one is Default. If you don’t have the time to create a model using AI, you can select one of the pre-existing models available in the system.
- The third option is Upload. If you prefer to use a real image instead of a generated or default model, you can upload an image of yourself or another model.
Next, scroll down to see two options:
- Single Garment
- Multiple Garments (both top and bottom)
Choose one option and upload the picture of the garment(s). It all depends on what your requirement is. Besides, there are pre-made garment hints for you to freely choose from.
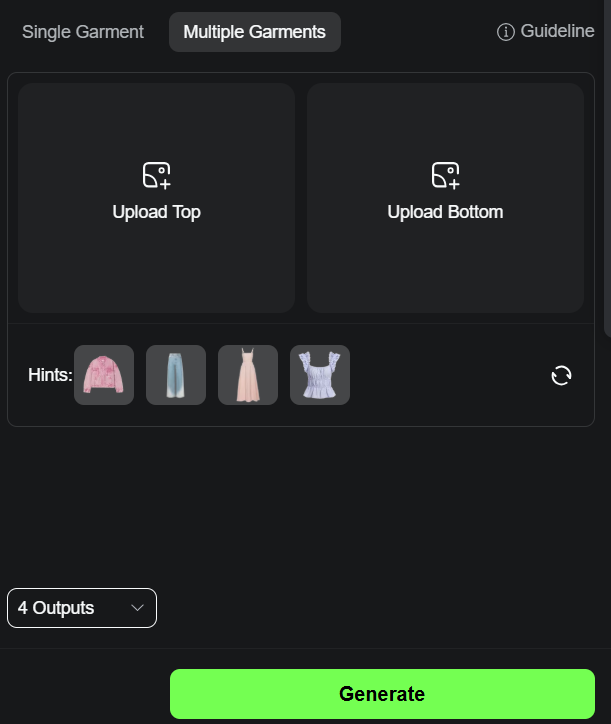
If you scroll down further, you’ll find another option: “Number of Outputs.” Keep in mind that selecting more outputs will consume more credits, too.
Once you’ve made your selections, you’re ready to hit the “Generate” button.
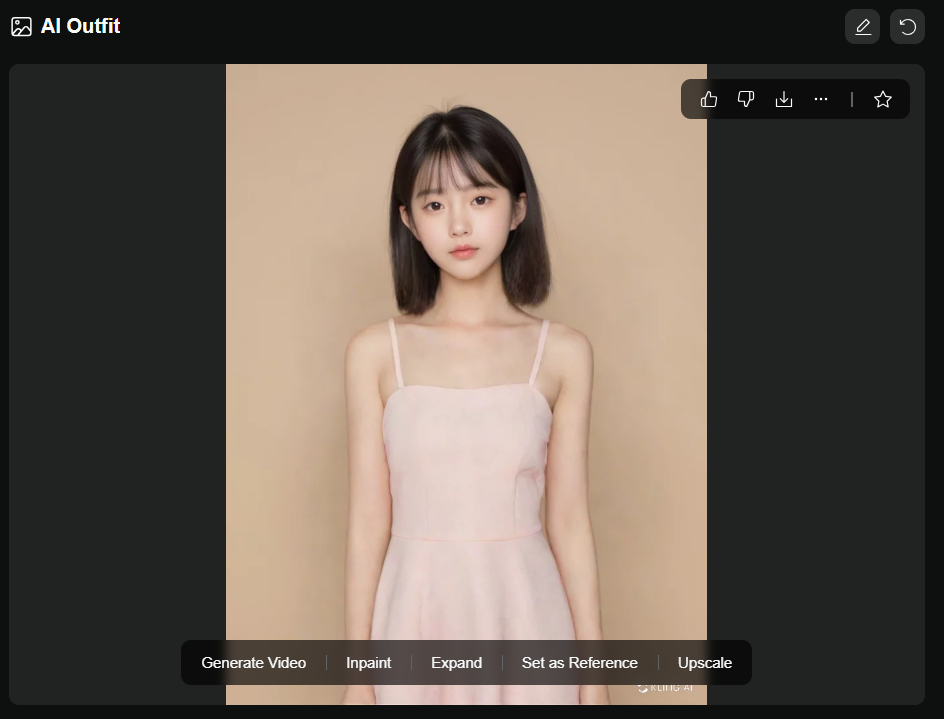
Step 3: Check the Results
The virtual try-on image will be ready in no time. You can hover your mouse over the image and select the download option to save it to your device instantly.
But that’s not all. When you hover your mouse over the image, you’ll see five more options:
- Generate Video: Use this virtual try-on image to generate a video with text prompt (optional).
- Inpaint: Use either Box Selection or Brush Selection to inpaint whatever areas you like.
- Expand: Adjust your image to a specific aspect ratio as you want.
- Set as Reference: Enter a text prompt to restyle this virtual try-on image to any style.
- Upscale: Improves the image quality, making it sharper and more refined. However, you will need a premium plan to use this feature.
Kling AI’s Virtual Try-On Application Scenarios
We've got a few application scenarios below:
Clothes Experience
Online shopping can be a guessing game. With Kling AI, shoppers can see how clothes fit or look before making a purchase. This not only makes shopping easier but also reduces the number of returns. For brands, it’s like bringing the fitting room to the customers’ screens.
Fashion Design
As a designer, you can bring your ideas to life (without the hassle of physical prototypes). Here’s how:
- Choose a Model
- Upload your designs.
- Match them with your chosen model.
- See your ideas come to life instantly.
Simple, right?
Conclusion
Kling AI’s Virtual Try-On makes clothes experience and designing feel effortless. Imagine getting realistic try-on results in just a few minutes—it’s perfect for anyone in e-commerce or visual content creation who wants to save time and still impress their audience.