

How to Use Seedream 5.5 to Create Stunning AI Images
What I like about Seedream 5.5 is that it works like a real production assistant rather than just a one-click image generator. With a controlled first image, I can iteratively edit across successive rounds with stable image quality. But for that polished final result, a slightly nuanced approach to image creation and refinement is best. Luckily, I’m here to explain what that involves!
TL;DR
To use Seedream 5.5, I recommend solving one defined visual problem at a time rather than condensing it all into a large prompt. First, create a strong composition with the right structure, subject, framing, mood, etc., then refine using simple, individually focused edits. After each round, it’ll be easier to track/protect good work. You can access Seedream 5.5 on Pollo AI now!
How To Use Seedream 5.5: At a Glance
Seedream 5.5 is all about steady and continuous image refinement, but before I dive into the particulars of using this model, let me give you a quick summary of its most practical workflows:
| Use case | Start with | What to later refine | Key instruction |
| Product images and e-commerce | Product shape, camera angle, composition, and background | Color variants, materials, reflections, props, and seasonal settings | Preserve the product silhouette, label placement, and proportions. |
| Transparent product cutouts | Subject, isolation, and required edge quality | Alpha edges, reflections, cast-shadow treatment, and export checks | Request a transparent background and verify the exported alpha channel. |
| Advertising and social campaigns | Campaign concept, subject, framing, and negative space for copy | Lighting, color direction, props, headline placement, and format variations | Keep the campaign identity fixed while changing one variable at a time. |
| Posters, menus, and infographics | Layout, panels, and visual structure | Exact copy, typography placement, icons, colors, and localization | Put exact text in quotation marks and proofread every word at full size. |
| Portraits and fashion concepts | Identity, pose, crop, wardrobe direction, and lighting | Expression, styling, background, makeup, and mood | State what the reference controls and preserve facial identity. |
| Packaging and brand concepts | Package form, label area, materials, and shelf or studio setting | Colorways, label variations, finishes, and merchandising scenes | Lock the logo, label layout, product proportions, and required copy; vary only the finish, color, or setting |
| Character, game, and film concepts | Character or environment design, silhouette, and composition | Props, costume details, atmosphere, lighting, and action variations | Maintain a fixed identity block and keep defining features consistent across scenes. |
Introducing Seedream 5.5: What Makes This AI Image Model Tick
I’ve been using Seedream 5.0 Pro for the past few months to handle my image projects. For the most part, I was happy with it. But the new Seedream 5.5 was just released, and I’m impressed by how it offers far more precise, production-focused control.
I can enjoy cleaner multi-round editing, improved realism, semi-transparent and transparent backgrounds, stronger small-text rendering, better multi-image blending, and up to 100 editable layers. So, what does this all boil down to?
Compared to before, it means less regeneration and manual clean-up whenever I need to refine specific parts of an image. But I quickly realized that this model doesn’t respond that well when I tried to solve too many problems at once each time.
For example, if I generate a character image but I want to change the shirt color, shoes, and pants, then it would be a mistake to try to continuously resolve multiple issues with one lengthy prompt. Why? Because this sometimes introduced new errors as I tried to fix the old ones.
Instead, I found that Seedream 5.5 works best when I correct individual issues through focused edits. In other words, it’s better to edit one thing at a time for more controlled refinement, preserving what already works, while also making the workflow easier to track.
But before that, you still need to set up a solid foundation. In other words, I need to render a strong first composition that has the right subject, framing, mood, text placement, etc. Having said that, let me show you what a proper Seedream 5.5 image workflow should look like.
Create, Refine, and Perfect Your Vision With Seedream 5.5
Create striking visuals with refined compositions, accurate details, and natural realism.
Try Seedream 5.5 Free
How To Use Seedream 5.5: A Practical, Iterative Workflow
Build Your Creative Brief
Before you start working on your image project, I suggest that you take a minute to define the most important fixed requirements to include in your first prompt. You can write down the subject, intended use, aspect ratio, audience, visual mood, must-preserve details, etc.
For example, the image must work as a 4:5 social post. The background color may vary, but the product color may not. The editorial shot must leave a space on the right for text. You need to define what must remain consistent, since everything else can be adjusted during editing.
Craft Your Prompts In Layers
Don’t craft prompts that simply read like a pile of adjectives. Instead, I would focus on structured visual language, because I’ve seen how Seedream 5.5 responds best to this. In fact, my rule of thumb is to define the task > subject and identity > composition > style > constraints.
For example, here’s how you can combine step 1 and step 2 for a solid starting point:
Create a vertical editorial portrait of a female Brazilian model, centered with comfortable headroom and empty space on the left for a headline. Preserve facial identity and natural skin texture. Soft window light from camera-right, warm neutral background, realistic fashion photography
Assign Each Reference a Role
If you’re using reference images, I must remind you to avoid using too many images because it can create competing instructions. Secondly, I recommend that you assign each one a job. Here’s an example of how I would organize references for the best results on Seedream 5.5:
Reference 1 controls the product shape and label placement. Use Reference 2 only for pose; do not copy its background or clothing color. Reference 3 sets the color palette and lighting mood. Combine these elements into one coherent studio composition
Generate a Focused First Pass
For the first image, I always say to prioritize the subject, composition, and lighting. So, my advice is to make sure the prompt isn’t overloaded with every possible detail. Just aim to nail the best structure. Especially with Seedream 5.5, it’s about building a strong first composition.
From there, it’ll be easier to edit than if the first render has the wrong proportions or subject identity. Also, if the image will have a lot of text, I recommend generating the visual structure first, accounting for empty space, then adding the final typography there in a separate session.
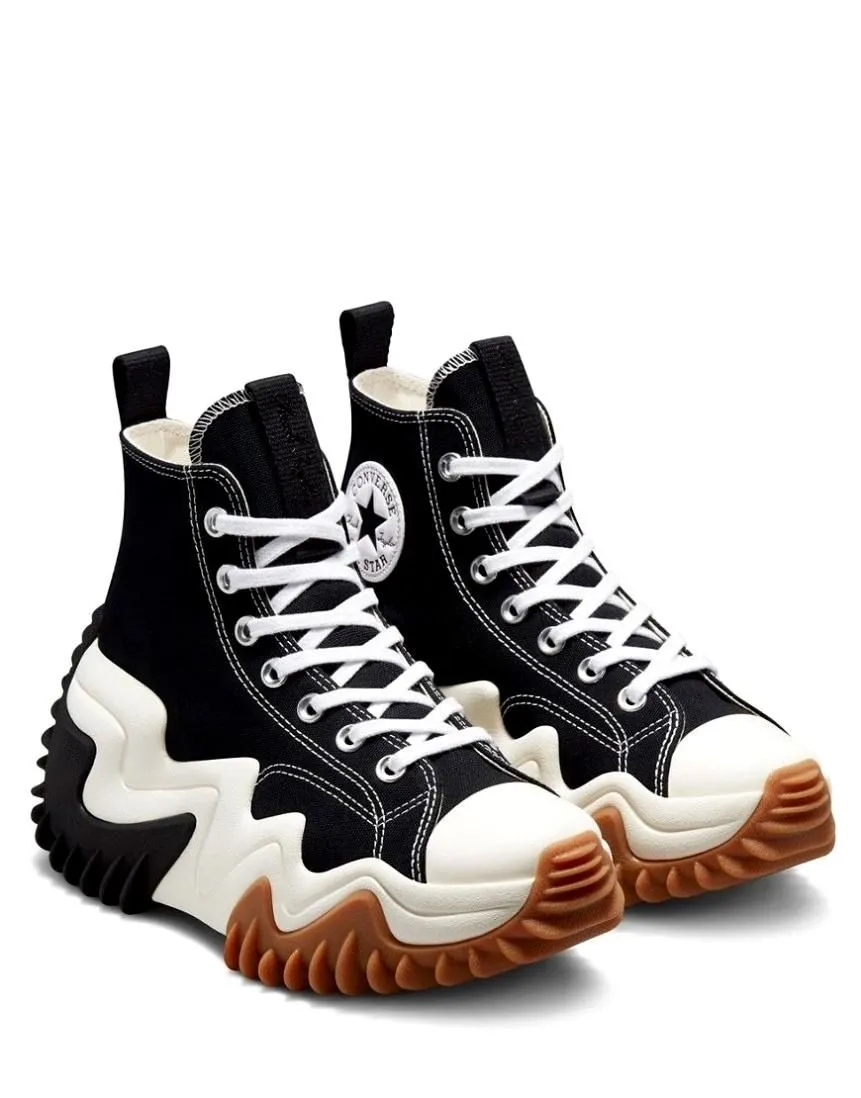
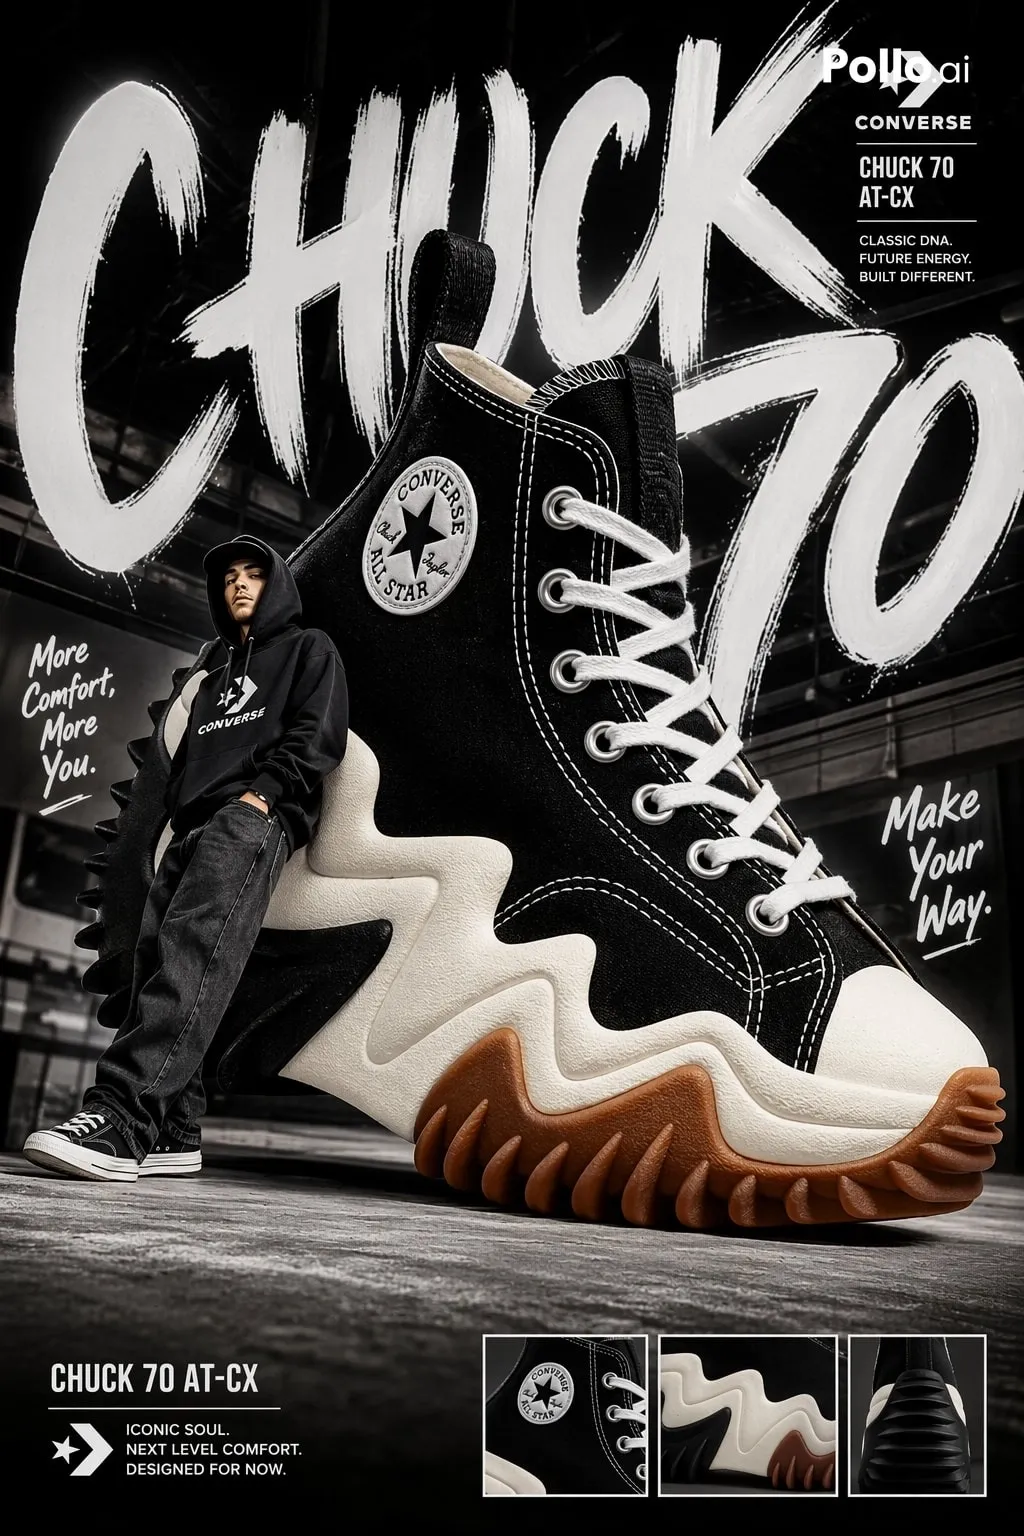
As an example, here’s what I generated in one of my Seedream 5.5 tests. As I intended, it’s a solid starting point that allows me to make smaller, continuous edits easily:
Prompt: Create a premium commercial poster for an American streetwear campaign. Feature the massive converse high-top sneaker design in the reference image and set it as the main structural element, with a fashion model in a hoodie leaning against its heel. Use a dynamic wide-angle perspective, bold urban composition, high-contrast studio lighting, rich textures, and clean negative space for branding. Convey energy, confidence, and contemporary streetwear luxury.
| Reference Image | Output Image |
|---|---|
 |  |
Be Surgical with Subsequent Edits
Seedream 5.5 is better at maintaining stable visual quality after multiple edits than its predecessor. So, don’t feel the need to condense every revision into one prompt. Instead, I would urge you to correct one issue at a time, even if it feels slower, like so:
| Prompt | Output Image |
|---|---|
| Edit only the background of the attached sneaker poster. Replace it with a dark, polished urban studio floor and a subtle concrete wall, using cool gray tones and controlled shadows. Preserve the sneaker’s size, shape, materials, perspective, position, the model’s pose and clothing, the lighting on the sneaker, and all existing negative space. Do not add text, logos, props, or extra people. | 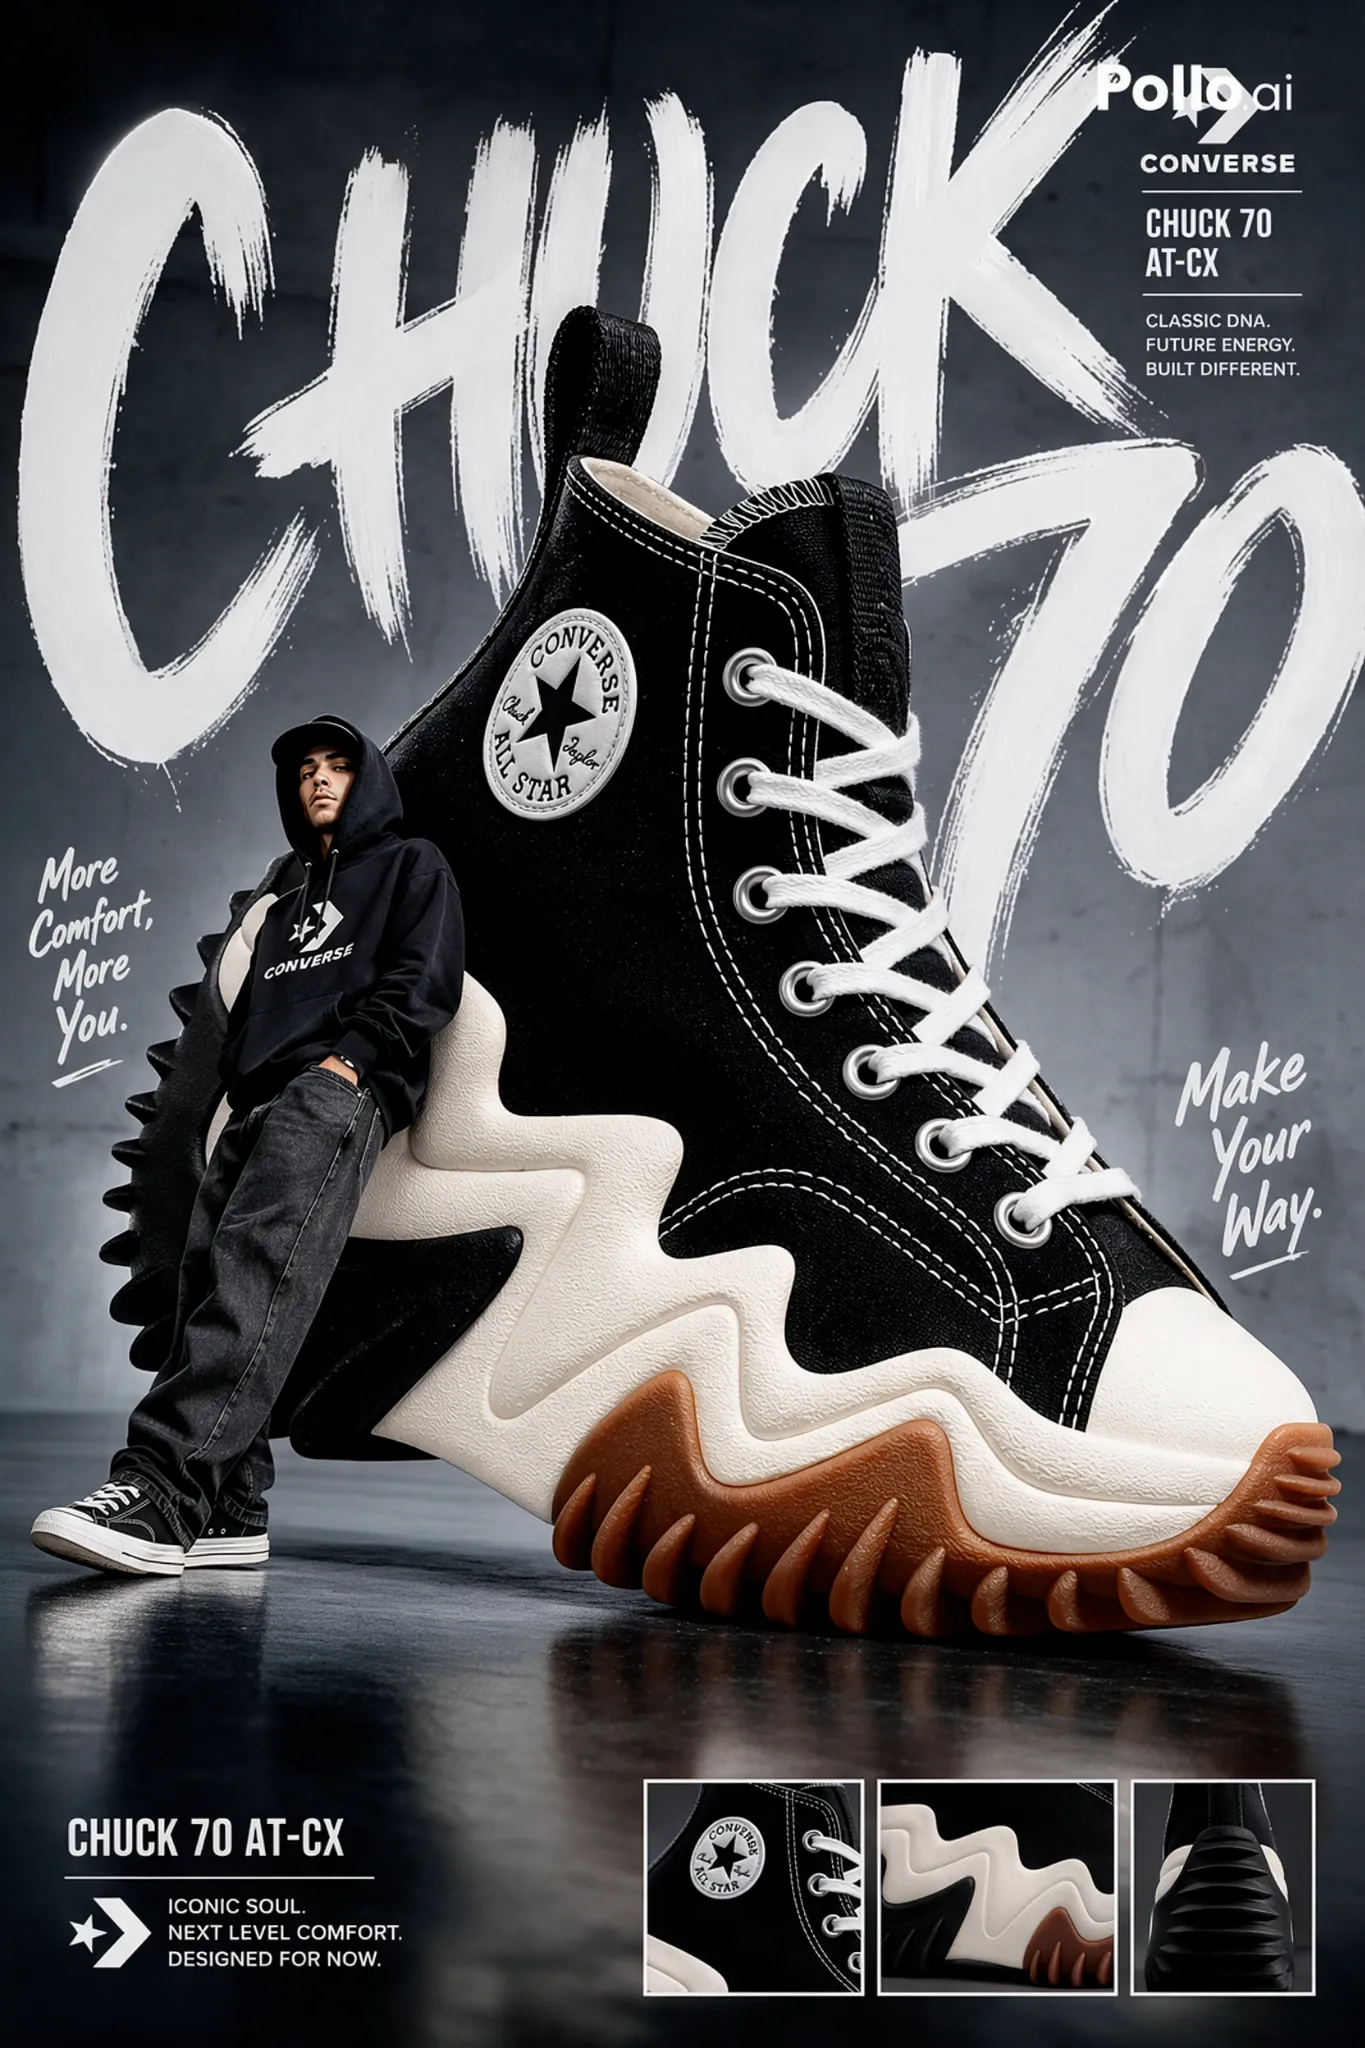 |
It’s all about making the changes narrow and testable. After each round, you can compare the new result with the previous one. I also recommend saving the successful versions rather than repeatedly editing the latest file without having a version to fall back to.
Generate Images with Seedream 5.5: Head to Pollo AI
I’ve shown you how to maximize Seedream 5.5, but do you know where you can access this AI image model and start using it? Personally, I suggest using Pollo AI. It’s what I’ve been relying on for months because it’s the AI-native creative suite for all.
Here, I have full access to all the latest AI image models, including Seedream 5.0 Pro, GPT Image 2.5, Nano Banana 2.1, and several others. This gives me the freedom to experiment with different models and concepts across various styles for the best possible outputs.
I’ve used it to generate portraits, posters, covers, thumbnails, logos, product shots, and more. But what I’ve enjoyed most is creating with Pollo Agent. With this iterative tool, the whole creative process is conversational, making it easier to brainstorm new ideas and refine them.
More importantly, I enjoy how fast, seamless, and efficient the Pollo AI platform is. Even on mobile, I can render images and edit them on the go, with no delays or errors. Just head there and sign up for an account. It’s free for first-timers, so you can explore Pollo AI at no cost!
Conclusion
I’ve handed you a clear roadmap on how to maximize Seedream 5.5, so you should be all set. Just remember, the key to consistent and usable results with this AI image model is steady and continuous iteration through individual edits. If you want to get started, try it on Pollo AI now!