

How To Use Vidu Q4: A Clear Guide to Reference-Driven Video Generation
Without text-to-video support, I see Vidu Q4 as a purely reference-driven model that requires you to have something specific to preserve. Whether it be a character, product, visual style, or environment, the model needs a visual baseline to work from. Of course, this demands a unique approach, so if you want to know how to generate a short, multi-shot clip, be sure to read on!
TL;DR
Vidu Q4 works best when you start with your strongest reference. With support for up to 15 images and 3 voice inputs, use I2V for a single image, or R2V for multiple. From there, prompt using timed beats and address your references in order: “image 1”, “image 2”, etc. Vidu Q4’s outputs tend to vary, so iterate by changing one variable at a time. Try it out on Pollo AI now!
Best Ways to Start Using Vidu Q4: At a Glance
After testing Vidu Q4, I find that it works best for projects that typically involve using a recurring character or a consistent look/voice. So, here are a few ways you can put it to good use:
| Use Case | Why Vidu Q4 Suits It | Recommended Workflow |
|---|---|---|
| Product advertisements | Multiple product references help preserve packaging, colors, logos, shape, and materials. Controlled camera instructions can create polished reveals or product rotations. | Reference-to-Video with product images, brand/style references, and a short camera-focused prompt. |
| Character animation | Character references help maintain the same face, clothing, hairstyle, and visual identity across a short sequence. | Reference-to-video with front, three-quarter, or side character images. |
| Dialogue and talking-character clips | Up to three voice references can guide vocal identity, emotional tone, and lip-synced delivery. | Reference-to-Video with character images, voice samples, explicit dialogue, and audio enabled. |
| Social-media clips | Q4 supports short clips, vertical aspect ratios, fast iteration, and visually immediate actions suited to platforms such as TikTok, Reels, and Shorts. | Image-to-Video or Reference-to-Video in 9:16, with one clear action and a strong opening frame. |
| Short series with recurring characters | Reusable image and voice references can help preserve character identity, visual style, and vocal consistency between episodes. | Reference-to-Video using a saved character reference set and consistent voice references. |
| Storyboard and concept visualization | A storyboard frame, mood board, or location image can be turned into a moving previs shot without building a full production. | Image-to-video for a single storyboard frame; Reference-to-Video for multiple scene elements. |
| Illustration and art animation | Existing artwork can be animated while preserving its character design, palette, and composition. | Reference-to-Video with a shot-by-shot prompt and clearly defined timing. |
| Fashion and look development | Reference images can establish clothing, styling, poses, lighting, and overall visual direction before animation. | Reference-to-Video with model, garment, styling, and environment references. |
| Visual effects tests | Q4 can create short multi-shot sequences with effects such as smoke, explosions, particles, etc. | Image-to-Video for a single effects shot; use Reference-to-Video when the subject and environment both need continuity. |
How To Make Vidu Q4 Work? Provide All the Right Information
I was excited to see that Vidu Q4 came with a ton of new upgrades over its predecessor, including higher resolution, smoother motion, richer VFX, and even multi-shot storytelling. But I consider its core selling point to be the number of references it now supports.
While I was let down by how it doesn’t support text-to-video generation, I was glad it accepts up to 15 reference images and 3 voice references. Now, it’s easier than ever to define and preserve a character, background, product, specific style direction, voice, etc., all in one take.
This is also the key to getting the most out of Vidu Q4 because I quickly discovered that its outputs can vary quite a bit from one generation to the next. And from what I’ve seen, it’s the quality of the reference set that dramatically impacts how much control you have.
In this respect, there are two key Vidu Q4 modes to consider: image-to-video (I2V) and reference-to-video (R2V). I recommend I2V if you only have a single image to act as the first frame. You should also make sure it clearly affirms the visual identity you want.
If you want to produce a more dynamic scene using several visual elements, then you’ll need R2V. Here, you can freely upload a character still, product image, location reference, style frame, prop, etc. The model will then combine them into a short scene.
Create Videos That Stand Out With Vidu Q4
Produce impressive videos with detailed visuals, dynamic character movements, and synchronized sound.
Try Vidu Q4 for Free
How To Use Vidu Q4: A Step-by-Step Workflow
I’ve laid out what makes Vidu Q4 tick, so that’s done. Now, let’s get into the step-by-step process of how to use this model to generate videos that match your vision.
#1. Plan the Shot
I’ve already touched on how Vidu Q4 can be sensitive when processing reference inputs. So, if you want to reduce the variance between outputs, then you need to plan the shot. This means defining a clear purpose for the video. Ask yourself: What do I want this clip to accomplish?
Is it to showcase a product? Introduce a character? Establish a location? The objective you choose is what determines the references you should upload. For instance, a product video needs one strong product image. But a character entrance may need several character shots.
#2. Choose a Mode and Upload References
As I said before, if you have only one image, then select image-to-video. But if you need multiple images or voice references, then reference-to-video is the go-to. Just remember to never upload unrelated images. If it’s not 100% necessary, then leave it.
I always like to say that every uploaded image must serve a purpose: This is the character. This is the product. This is where the scene takes place. This is the visual style the video should mimic. After that, it’s up to the prompt to explain how these elements will behave in the scene.
#3. Craft Your Prompt Using Timed Beats
Vidu Q4 is limited to about 16 seconds per clip, which means every prompt I write can only support a limited number of story beats. In other words, you don’t have a lot of room to make too many meaningful changes within the shot and at 16s, I’d say that 3 beats is enough.
In fact, here’s my personal breakdown of what each beat should represent:
- 0–4 seconds: Establish the location and characters.
- 4–10 seconds: Show the main action or interaction.
- 10–16 seconds: Deliver a reaction, reveal, or ending.
Always include the subject, action, camera movement, timing, visual style, dialogue if needed, and sound cues. Here’s a prompt structure that I recommend you follow for Vidu Q4:
Keep [subject and important details] from image 1. From 0–3 seconds, [first action] in a [shot type]. From 3–7 seconds, [second action] as the camera [movement]. From 7–10 seconds, [final beat]. Use [lighting/style]. Include [dialogue, ambience, SFX]. Do not add [unwanted elements].
You can see this prompt format in action with this TVC ad video that I recently generated:
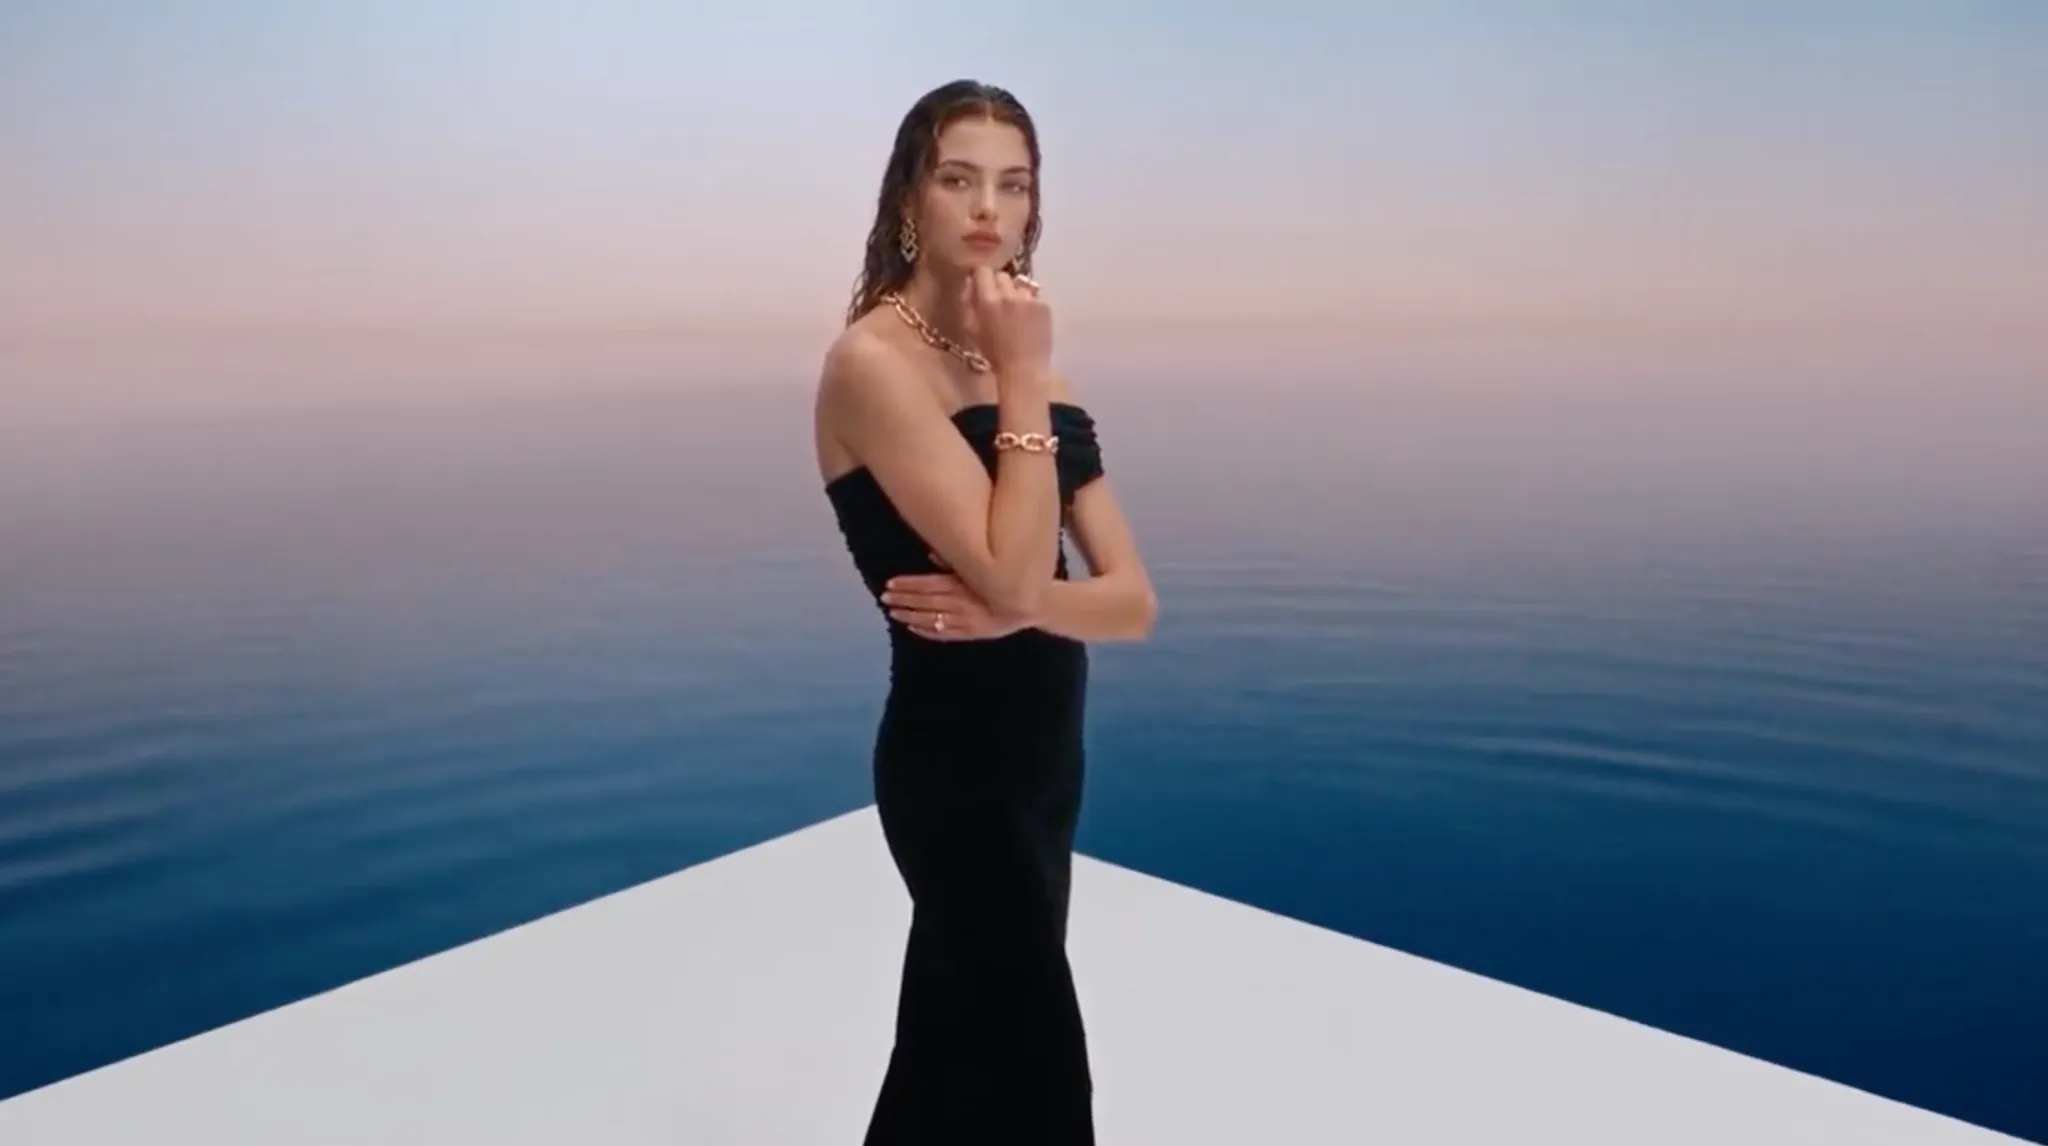
Prompt: Keep the model’s identity, elegant black dress, and gold jewelry from image 1. From 0–5 seconds, capture confident poses with cinematic medium shots, graceful movements, and warm, dreamy lighting. From 5–11 seconds, use dynamic cuts and tracking shots, highlighting earrings, necklaces, and bracelets through detailed macro close-ups and golden reflections. From 11–16 seconds, finish with an elegant portrait and dramatic jewelry close-ups. Use luxurious editorial styling, soft ambient music, and delicate jewelry chimes.
| Ref Image | Output Video |
|---|---|
 |
#5. Upload Voice References for Dialogue
Voice referencing is another key feature that I’m pleased to see in Vidu Q4. It can pay dividends, especially for multi-character scenes since it accepts up to 3 voice clips. But don’t make the mistake of assuming the audio clip will automatically supply the words.
The audio reference inputs help set vocal identity, emotional delivery, and lip-sync for convincing performances. So, I strongly suggest that you write the dialogue in the prompt and assign it. For example, “the character from image 1 says ‘Welcome back’ in the voice from audio 1.”
#6. Generate Your Video
If you follow the steps I’ve outlined from 1 to 5, you should get a good result that matches your intended vision. Here’s a promotional video I recently rendered with Vidu Q4 that proves it:
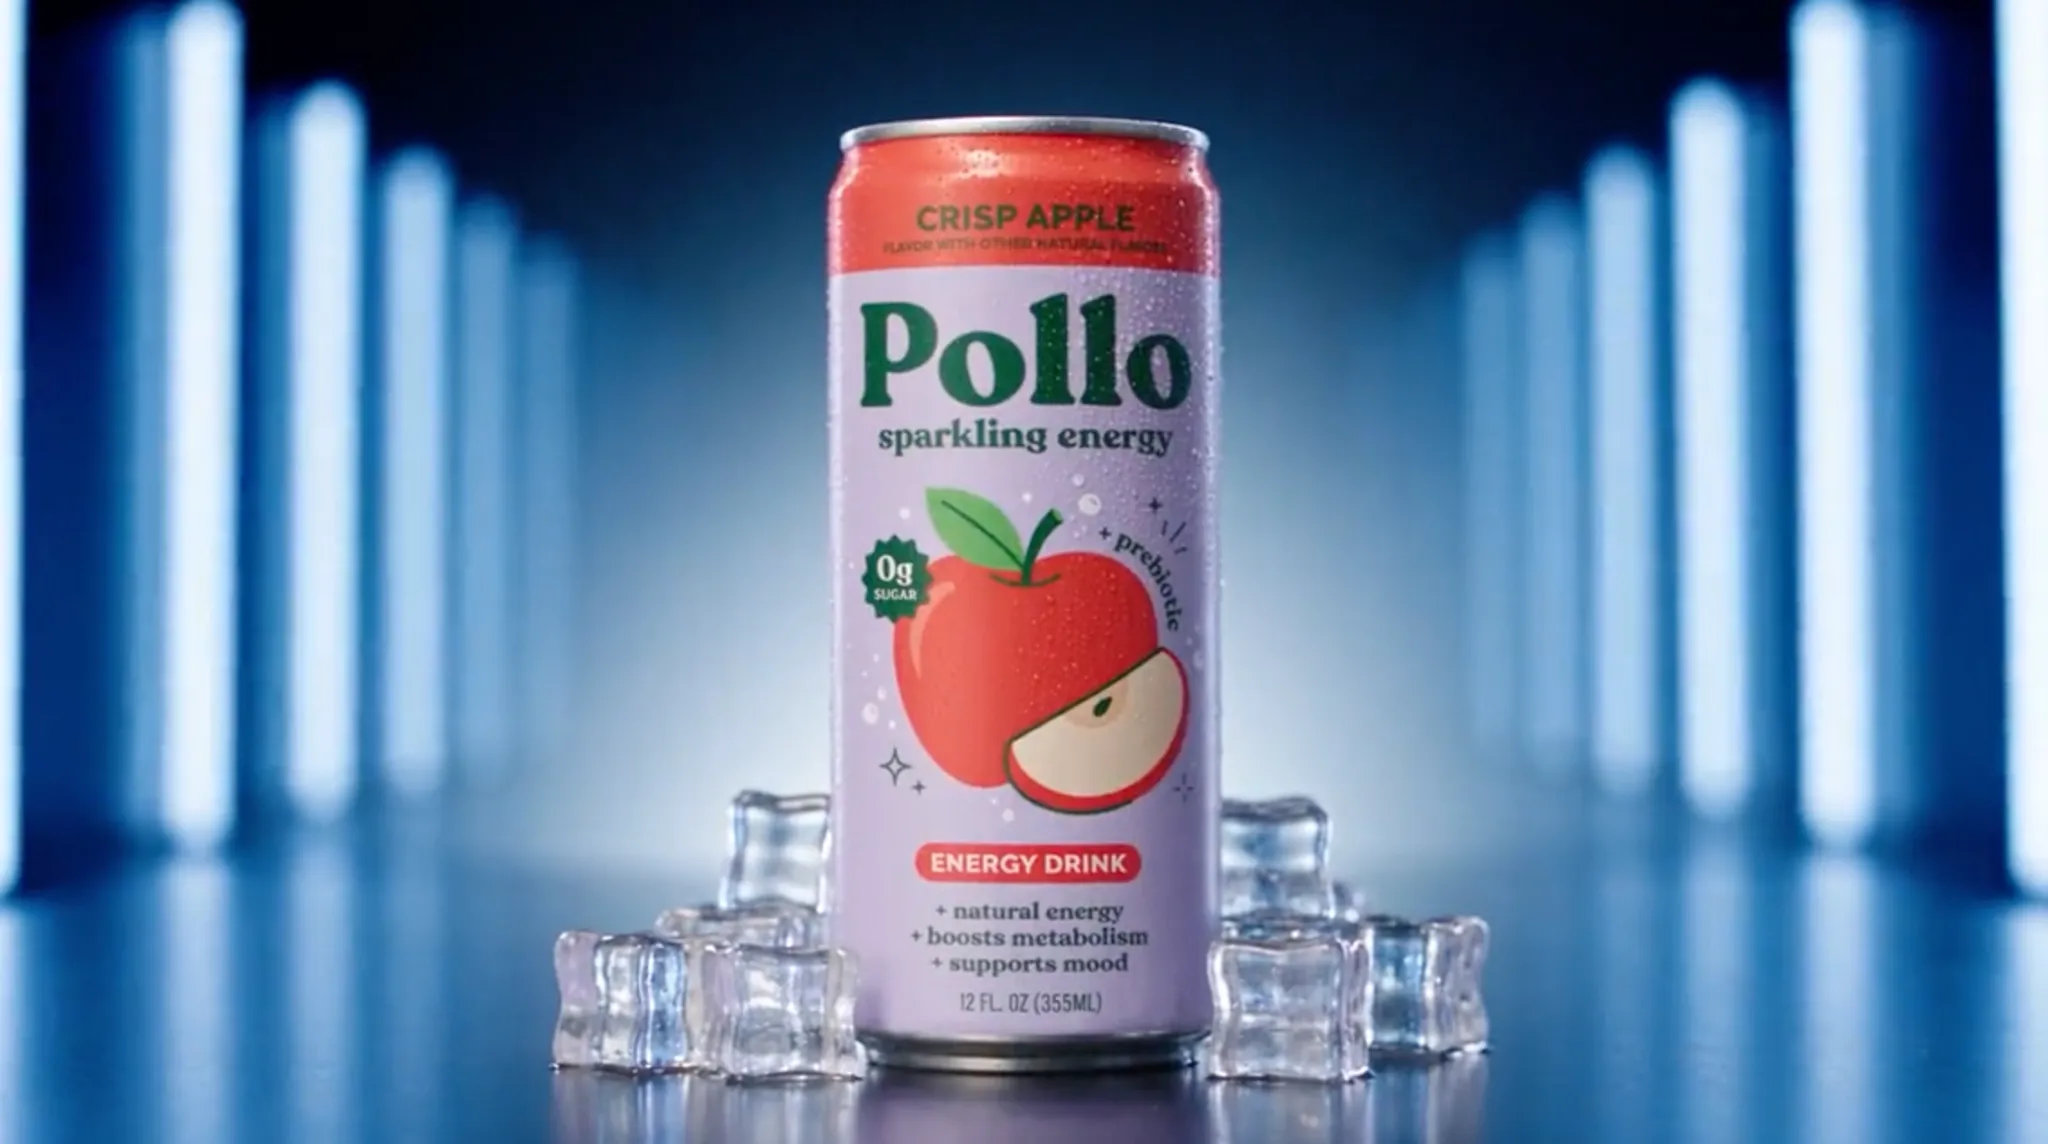
Prompt: Create a high-energy promotional commercial for Pollo, an apple-flavoured energy drink. From 0–5 seconds, fly the camera through bold, floating typography into a stylish hotel bar party overlooking a vibrant nighttime cityscape. From 5–11 seconds, transition through swirling, bubbling soda into a dark fluorescent-lit hallway, then fly through a glowing blue portal formed by letters. From 11–16 seconds, reveal a crowd beneath a massive neon sign before cutting to a dramatic, still product shot of the Pollo can. Use electric colors, cinematic lighting, seamless text-driven transitions, energetic electronic music, and fizzy sound effects. Keep the can design and branding consistent.
| Ref Image | Output Video |
|---|---|
 |
Generate Videos with Vidu Q4: Use Pollo AI to Get Started
I’ve given you the lowdown on how to use Vidu Q4 and get the best results out of it, so now it’s time for you to put that into action. To get started with this model, I recommend using Pollo AI if you want the whole video creation process to truly be effortless.
With full access to leading AI video models, including Vidu Q4, Wan 3.0, MiniMax H3 Max, and others, it’s the ultimate AI creative suite for brands, marketers, filmmakers, and creators. Here, I have the freedom to experiment with different models until I produce the best possible video.
From cinematic sequences and animated shots to promotional brand content and social media clips, Pollo AI has me covered in just a few clicks. And if I ever need help with turning raw ideas into publish-ready videos, I just turn to Pollo Agent.
It’s a powerful iterative tool that automates structure, pacing, visuals, and more. I just describe the scene I want via chat, and the tool handles it; no manual editing required. Plus, if I want to refine the output, I can keep making adjustments without starting from scratch!
But my favorite platform feature is Pollo Director. If I ever want to produce an extended scene, this gives me full control of every component on a multitrack timeline. Whether it be characters, lighting, camera, dialogue, subtitles, etc., I can fine-tune each aspect for the perfect final cut.
So, if you want to use Vidu Q4, I’d say Pollo AI is a must. Best part? You can start generating videos at no cost via the free trial plan. Just head over there and sign up to get started!
Conclusion
There you have it! I believe getting the most out of Vidu Q4 is all about using the right references and putting them to work effectively via timed beat prompting. So, take what you’ve learned here and feel free to go test out the new model; I’d say it’s definitely worth exploring!